Löffelmaterial UV Tray material UV Matériau UV pour porte
Anuncio
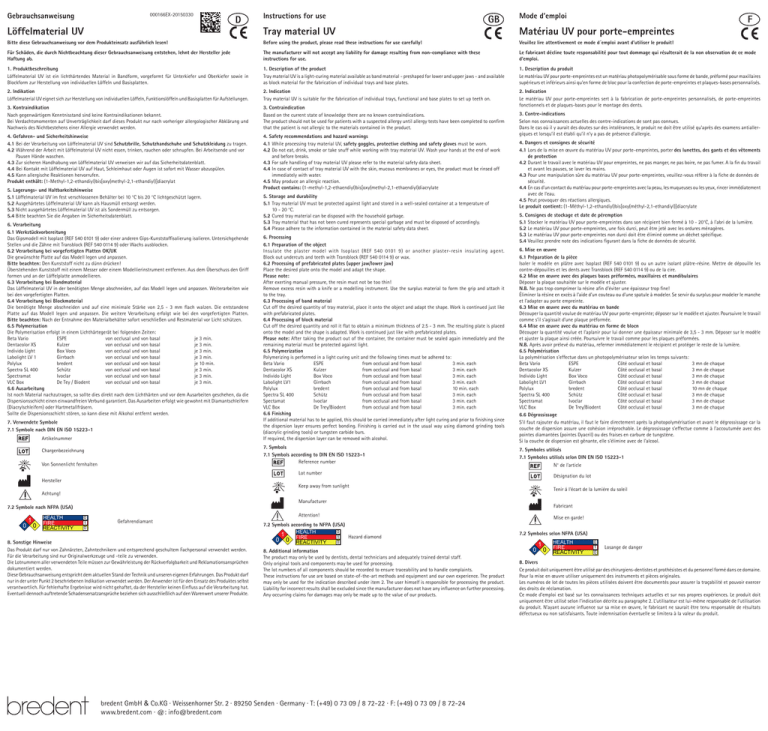
Gebrauchsanweisung 000166EX-20150330 Löffelmaterial UV D Instructions for use Tray material UV GB Mode d’emploi Matériau UV pour porte-empreintes F Bitte diese Gebrauchsanweisung vor dem Produkteinsatz ausführlich lesen! Before using the product, please read these instructions for use carefully! Veuillez lire attentivement ce mode d´emploi avant d’utiliser le produit! Für Schäden, die durch Nichtbeachtung dieser Gebrauchsanweisung entstehen, lehnt der Hersteller jede Haftung ab. The manufacturer will not accept any liability for damage resulting from non-compliance with these instructions for use. Le fabricant décline toute responsabilité pour tout dommage qui résulterait de la non observation de ce mode d’emploi. 1. Produktbeschreibung Löffelmaterial UV ist ein lichthärtendes Material in Bandform, vorgeformt für Unterkiefer und Oberkiefer sowie in Blockform zur Herstellung von individuellen Löffeln und Basisplatten. 1. Description of the product Tray material UV is a light-curing material available as band material - preshaped for lower and upper jaws - and available as block material for the fabrication of individual trays and base plates. 1. Description du produit Le matériau UV pour porte-empreintes est un matériau photopolymérisable sous forme de bande, préformé pour maxillaires supérieurs et inférieurs ainsi qu’en forme de bloc pour la confection de porte-empreintes et plaques-bases personnalisés. 2. Indikation Löffelmaterial UV eignet sich zur Herstellung von individuellen Löffeln, Funktionslöffeln und Basisplatten für Aufstellungen. 2. Indication Tray material UV is suitable for the fabrication of individual trays, functional and base plates to set up teeth on. 3. Kontraindikation Nach gegenwärtigem Kenntnisstand sind keine Kontraindikationen bekannt. Bei Verdachtsmomenten auf Unverträglichkeit darf dieses Produkt nur nach vorheriger allergologischer Abklärung und Nachweis des Nichtbestehens einer Allergie verwendet werden. 3. Contraindication Based on the current state of knowledge there are no known contraindications. The product should not be used for patients with a suspected allergy until allergy tests have been completed to confirm that the patient is not allergic to the materials contained in the product. 2. Indication Le matériau UV pour porte-empreintes sert à la fabrication de porte-empreintes personnalisés, de porte-empreintes fonctionnels et de plaques-bases pour le montage des dents. 4. Gefahren- und Sicherheitshinweise 4.1Bei der Verarbeitung von Löffelmaterial UV sind Schutzbrille, Schutzhandschuhe und Schutzkleidung zu tragen. 4.2Während der Arbeit mit Löffelmaterial UV nicht essen, trinken, rauchen oder schnupfen. Bei Arbeitsende und vor Pausen Hände waschen. 4.3Zur sicheren Handhabung von Löffelmaterial UV verweisen wir auf das Sicherheitsdatenblatt. 4.4Bei Kontakt mit Löffelmaterial UV auf Haut, Schleimhaut oder Augen ist sofort mit Wasser abzuspülen. 4.5Kann allergische Reaktionen hervorrufen. Produkt enthält: (1-Methyl-1,2-ethandiyl)bis[oxy(methyl-2,1-ethandiyl)]diacrylat 4. Safety recommendations and hazard warnings 4.1While processing tray material UV, safety goggles, protective clothing and safety gloves must be worn. 4.2Do not eat, drink, smoke or take snuff while working with tray material UV. Wash your hands at the end of work and before breaks. 4.3For safe handling of tray material UV please refer to the material safety data sheet. 4.4In case of contact of tray material UV with the skin, mucous membranes or eyes, the product must be rinsed off immediately with water. 4.5May produce an allergic reaction. Product contains: (1-methyl-1,2-ethaendiyl)bis[oxy(methyl-2,1-ethaendiyl)diacrylate 5. Lagerungs- und Haltbarkeitshinweise 5.1 Löffelmaterial UV im fest verschlossenen Behälter bei 10 °C bis 20 °C lichtgeschützt lagern. 5.2 Ausgehärtetes Löffelmaterial UV kann als Hausmüll entsorgt werden. 5.3 Nicht ausgehärtetes Löffelmaterial UV ist als Sondermüll zu entsorgen. 5.4 Bitte beachten Sie die Angaben im Sicherheitsdatenblatt. 6. Verarbeitung 6.1 Werkstückvorbereitung Das Gipsmodell mit Isoplast (REF 540 0101 9) oder einer anderen Gips-Kunststoffisolierung isolieren. Untersichgehende Stellen und die Zähne mit Transblock (REF 540 0114 9) oder Wachs ausblocken. 6.2 Verarbeitung bei vorgefertigten Platten OK/UK Die gewünschte Platte auf das Modell legen und anpassen. Bitte beachten: Den Kunststoff nicht zu dünn drücken! Überstehenden Kunststoff mit einem Messer oder einem Modellierinstrument entfernen. Aus dem Überschuss den Griff formen und an der Löffelplatte anmodellieren. 6.3 Verarbeitung bei Bandmaterial Das Löffelmaterial UV in der benötigten Menge abschneiden, auf das Modell legen und anpassen. Weiterarbeiten wie bei den vorgefertigten Platten. 6.4 Verarbeitung bei Blockmaterial Die benötigte Menge abschneiden und auf eine minimale Stärke von 2,5 - 3 mm flach walzen. Die entstandene Platte auf das Modell legen und anpassen. Die weitere Verarbeitung erfolgt wie bei den vorgefertigten Platten. Bitte beachten: Nach der Entnahme den Materialbehälter sofort verschließen und Restmaterial vor Licht schützen. 6.5 Polymerisation Die Polymerisation erfolgt in einem Lichthärtegerät bei folgenden Zeiten: Beta Vario ESPE von occlusal und von basal je 3 min. Dentacolor XS Kulzer von occlusal und von basal je 3 min. Individo Light Box Voco von occlusal und von basal je 3 min. Labolight LV 1 Girrbach von occlusal und von basal je 3 min. Polylux bredent von occlusal und von basal je 10 min. Spectra SL 400 Schütz von occlusal und von basal je 3 min. Spectramat Ivoclar von occlusal und von basal je 3 min. VLC Box De Tey / Biodent von occlusal und von basal je 3 min. 6.6 Ausarbeitung Ist noch Material nachzutragen, so sollte dies direkt nach dem Lichthärten und vor dem Ausarbeiten geschehen, da die Dispersionsschicht einen einwandfreien Verbund garantiert. Das Ausarbeiten erfolgt wie gewohnt mit Diamantschleifern (Diacrylschleifern) oder Hartmetallfräsern. Sollte die Dispersionsschicht stören, so kann diese mit Alkohol entfernt werden. 7. Verwendete Symbole 7.1 Symbole nach DIN EN ISO 15223-1 Artikelnummer 5. Storage and durability 5.1Tray material UV must be protected against light and stored in a well-sealed container at a temperature of 10 - 20 °C. 5.2Cured tray material can be disposed with the household garbage. 5.3Tray material that has not been cured represents special garbage and must be disposed of accordingly. 5.4Please adhere to the information contained in the material safety data sheet. 6. Processing 6.1 Preparation of the object Insulate the plaster model with Isoplast (REF 540 0101 9) or another plaster-resin insulating agent. Block out undercuts and teeth with Transblock (REF 540 0114 9) or wax. 6.2 Processing of prefabricated plates (upper jaw/lower jaw) Place the desired plate onto the model and adapt the shape. Please note: After exerting manual pressure, the resin must not be too thin! Remove excess resin with a knife or a modelling instrument. Use the surplus material to form the grip and attach it to the tray. 6.3 Processing of band material Cut off the desired quantity of tray material, place it onto the object and adapt the shape. Work is continued just like with prefabricated plates. 6.4 Processing of block material Cut off the desired quantity and roll it flat to obtain a minimum thickness of 2.5 - 3 mm. The resulting plate is placed onto the model and the shape is adapted. Work is continued just like with prefabricated plates. Please note: After taking the product out of the container, the container must be sealed again immediately and the remaining material must be protected against light. 6.5 Polymerization Polymerizing is performed in a light curing unit and the following times must be adhered to: Beta Vario ESPE from occlusal and from basal 3 min. each Dentacolor XS Kulzer from occlusal and from basal 3 min. each Individo Light Box Voco from occlusal and from basal 3 min. each Labolight LV1 Girrbach from occlusal and from basal 3 min. each Polylux bredent from occlusal and from basal 10 min. each Spectra SL 400 Schütz from occlusal and from basal 3 min. each Spectamat Ivoclar from occlusal and from basal 3 min. each VLC Box De Trey/Biodent from occlusal and from basal 3 min. each 6.6 Finishing If additional material has to be applied, this should be carried immediately after light curing and prior to finishing since the dispersion layer ensures perfect bonding. Finishing is carried out in the usual way using diamond grinding tools (diacrylic grinding tools) or tungsten carbide burs. If required, the dispersion layer can be removed with alcohol. 7. Symbols 7.1 Symbols according to DIN EN ISO 15223-1 Reference number Chargenbezeichnung Von Sonnenlicht fernhalten 3. Contre-indications Selon nos connaissances actuelles des contre-indications de sont pas connues. Dans le cas où il y aurait des doutes sur des intolérances, le produit ne doit être utilisé qu’après des examens antiallergiques et lorsqu’il est établi qu’il n’y a pas de présence d’allergie. 4. Dangers et consignes de sécurité 4.1Lors de la mise en œuvre du matériau UV pour porte-empreintes, porter des lunettes, des gants et des vêtements de protection 4.2Durant le travail avec le matériau UV pour empreintes, ne pas manger, ne pas boire, ne pas fumer. A la fin du travail et avant les pauses, se laver les mains. 4.3Pour une manipulation sûre du matériau UV pour porte-empreintes, veuillez-vous référer à la fiche de données de sécurité. 4.4 En cas d’un contact du matériau pour porte-empreintes avec la peau, les muqueuses ou les yeux, rincer immédiatement avec de l’eau. 4.5Peut provoquer des réactions allergiques. Le produit contient: (1-Méthyl-1,2-ethandiyl)bis[oxy(méthyl-2,1-ethandiyl)]diacrylate 5. Consignes de stockage et date de péremption 5.1Stocker le matériau UV pour porte-empreintes dans son récipient bien fermé à 10 - 20°C, à l’abri de la lumière. 5.2Le matériau UV pour porte-empreintes, une fois durci, peut être jeté avec les ordures ménagères. 5.3Le matériau UV pour porte-empreintes non durci doit être éliminé comme un déchet spécifique. 5.4Veuillez prendre note des indications figurant dans la fiche de données de sécurité. 6. Mise en œuvre 6.1 Préparation de la pièce Isoler le modèle en plâtre avec Isoplast (REF 540 0101 9) ou un autre isolant plâtre-résine. Mettre de dépouille les contre-dépouilles et les dents avec Transblock (REF 540 0114 9) ou de la cire. 6.2 Mise en œuvre avec des plaques bases préformées, maxillaires et mandibulaires Déposer la plaque souhaitée sur le modèle et ajuster. N.B. Ne pas trop comprimer la résine afin d’éviter une épaisseur trop fine! Éliminer la résine en excès à l’aide d’un couteau ou d’une spatule à modeler. Se servir du surplus pour modeler le manche et l’adapter au porte empreinte. 6.3 Mise en œuvre avec du matériau en bande Découper la quantité voulue de matériau UV pour porte-empreinte; déposer sur le modèle et ajuster. Poursuivre le travail comme s’il s’agissait d’une plaque préformée. 6.4 Mise en œuvre avec du matériau en forme de blocn Découper la quantité voulue et l’aplanir pour lui donner une épaisseur minimale de 3,5 - 3 mm. Déposer sur le modèle et ajuster la plaque ainsi créée. Poursuivre le travail comme pour les plaques préformées. N.B. Après avoir prélevé du matériau, refermer immédiatement le récipient et protéger le reste de la lumière. 6.5 Polymérisation La polymérisation s’effectue dans un photopolymérisateur selon les temps suivants: Beta Vario ESPE Côté occlusal et basal 3 mn de chaque Dentacolor XS Kulzer Côté occlusal et basal 3 mn de chaque Individo Light Box Voco Côté occlusal et basal 3 mn de chaque Labolight LV1 Girrbach Côté occlusal et basal 3 mn de chaque Polylux bredent Côté occlusal et basal 10 mn de chaque Spectra SL 400 Schütz Côté occlusal et basal 3 mn de chaque Spectramat Ivoclar Côté occlusal et basal 3 mn de chaque VLC Box De Trey/Biodent Côté occlusal et basal 3 mn de chaque 6.6 Dégrossissage S’il faut rajouter du matériau, il faut le faire directement après la photopolymérisation et avant le dégrossissage car la couche de dispersion assure une cohésion irréprochable. Le dégrossissage s’effectue comme à l’accoutumée avec des pointes diamantées (pointes Dyacril) ou des fraises en carbure de tungstène. Si la couche de dispersion est gênante, elle s’élimine avec de l’alcool. 7. Symboles utilisés 7.1 Symboles utilisés selon DIN EN ISO 15223-1 N° de l‘article Lot number Hersteller Désignation du lot Keep away from sunlight Tenir á l‘écart de la lumiére du soleil Achtung! Manufacturer 7.2 Symbole nach NFPA (USA) 0 1 0 HEALTH FIRE REACTIVITY 0 1 0 Fabricant Attention! Gefahrendiamant 8. Sonstige Hinweise Das Produkt darf nur von Zahnärzten, Zahntechnikern und entsprechend geschultem Fachpersonal verwendet werden. Für die Verarbeitung sind nur Originalwerkzeuge und -teile zu verwenden. Die Lotnummern aller verwendeten Teile müssen zur Gewährleistung der Rückverfolgbarkeit und Reklamationsansprüchen dokumentiert werden. Diese Gebrauchsanweisung entspricht dem aktuellen Stand der Technik und unseren eigenen Erfahrungen. Das Produkt darf nur in der unter Punkt 2 beschriebenen Indikation verwendet werden. Der Anwender ist für den Einsatz des Produktes selbst verantwortlich. Für fehlerhafte Ergebnisse wird nicht gehaftet, da der Hersteller keinen Einfluss auf die Verarbeitung hat. Eventuell dennoch auftretende Schadensersatzansprüche beziehen sich ausschließlich auf den Warenwert unserer Produkte. 7.2 Symbols according to NFPA (USA) 0 HEALTH 1 1 Hazard diamond 0 0 FIRE 0 REACTIVITY 8. Additional information The product may only be used by dentists, dental technicians and adequately trained dental staff. Only original tools and components may be used for processing. The lot numbers of all components should be recorded to ensure traceability and to handle complaints. These instructions for use are based on state-of-the-art methods and equipment and our own experience. The product may only be used for the indication described under item 2. The user himself is responsible for processing the product. Liability for incorrect results shall be excluded since the manufacturer does not have any influence on further processing. Any occurring claims for damages may only be made up to the value of our products. bredent GmbH & Co.KG · Weissenhorner Str. 2 · 89250 Senden · Germany · T: (+49) 0 73 09 / 8 72-22 · F: (+49) 0 73 09 / 8 72-24 www.bredent.com · @: [email protected] Mise en garde! 7.2 Symboles selon NFPA (USA) 0 1 0 HEALTH FIRE REACTIVITY 0 1 0 Losange de danger 8. Divers Ce produit doit uniquement être utilisé par des chirurgiens-dentistes et prothésistes et du personnel formé dans ce domaine. Pour la mise en œuvre utiliser uniquement des instruments et pièces originales. Les numéros de lot de toutes les pièces utilisées doivent être documentés pour assurer la traçabilité et pouvoir exercer des droits de réclamation. Ce mode d’emploi est basé sur les connaissances techniques actuelles et sur nos propres expériences. Le produit doit uniquement être utilisé selon l’indication décrite au paragraphe 2. L’utilisateur est lui-même responsable de l’utilisation du produit. N’ayant aucune influence sur sa mise en œuvre, le fabricant ne saurait être tenu responsable de résultats défectueux ou non satisfaisants. Toute indemnisation éventuelle se limitera à la valeur du produit. Istruzioni per l`uso Cucchiaio fotopolimerizzabile UV I Folleto de instrucciones E Material de luz UV Leggere attentamente le istruzioni per l’uso prima di utilizzare il prodotto! Rogamos lean detenidamente la información de producto ante de su uso! Il produttore non si assume alcuna responsabilità per danni, dovuti all’inosservanza delle presenti istruzioni d’uso. Por daños producidos por no tener en cuenta esta hoja de instrucción, no se hace responsable el fabricante. 1. Descrizione del prodotto Il cucchiaio fotopolimerizzabile UV è un materiale fotopolimerizzabile, disponibile sia in formato a nastro, già preformato per arcata inferiore e superiore, che in formato a blocchi per realizzare cucchiai individuali e basi in resina. 2. Indicazioni Il cucchiaio fotopolimerizzabile UV è indicato per la produzione di cucchiai individuali, funzionali e di basi in resina per montaggi. 3. Controindicazioni In base allo stato attuale delle nostre conoscenze non sono note controindicazioni. In caso di sospetto di intolleranza a questo prodotto, quest’ultimo deve essere utilizzato solo previo controllo allergologico e successiva attestazione dell’assenza di eventuali allergie. 4. Avvertenze sui pericoli e per la sicurezza 4.1Durante la preparazione del cucchiaio fotopolimerizzabile UV si devono indossare occhiali protettivi, camice e guanti protettivi. 4.2Durante il lavoro con il cucchiaio fotopolimerizzabile UV non mangiare, bere o fumare. Alla fine del turno lavoro o prima della pausa lavarsi bene le mani. 4.3Per un utilizzo sicuro del cucchiaio fotopolimerizzazione UV consigliamo di leggere la scheda di sicurezza. 4.4 In caso di contatto del cucchiaio fotopolimerizzabile UV con la pelle, con le mucose o con gli occhi, sciacquare subito con acqua corrente. 4.5Può provocare reazioni allergiche. Il prodotto contiene: (1-metil-1,2-etandiil)bis[ossi(metil-2,1-etandiil)]diacrilato 5. Avvertenze per la conservazione e la durata 5.1 Conservare il cucchiaio fotopolimerizzabile UV nelle confezioni chiuse ermeticamente, ad una temperatura compresa tra 10 °C e 20 °C ed al riparo dalla luce. 5.2Il cucchiaio fotopolimerizzabile UV indurito può essere smaltito come rifiuto domestico. 5.3Il cucchiaio fotopolimerizzabile UV non indurito deve essere smaltito come rifiuto tossico. 5.4Leggere attentamente le indicazioni sulla scheda di sicurezza. 6. Lavorazione 6.1 Preparazione del pezzo Isolare il modello in gesso con Isoplast (REF 540 0101 9) o con altro isolante per gesso-resina. Chiudere i sottosquadri con Transblock (REF 540 0114 9) o con della cera. 6.2 Preparazione con basi preformate per arc sup. / arc. inf. Posizionare sul modello le basi desiderate ed adattarle. Attenzione: Non comprimere troppo lo strato della resina in fase di modellazione! Asportare la resina in eccesso con un coltello o con uno strumento da modellazione. Con l’eccedenza modellare il manico ed adattarlo al cucchiaio. 6.3 Preparazione con cucchiaio fotopolimerizzabile a nastro Tagliare il cucchiaio fotopolimerizzabile UV nella quantità necessaria, posizionare sul modello ed adattare. Proseguire la lavorazione come per le basi preformate. 6.4 Preparazione con cucchiaio fotopolimerizzabile in blocco Tagliare la quantità necessaria e tirarlo a spessore uniforme di 2,5 – 3 mm. Applicare la base risultante sul modello ed adattarla. Proseguire la lavorazione come per le basi preformate. Attenzione: Dopo aver preso la quantità necessaria di prodotto, richiudere subito il contenitore e proteggere il resto del materiale dalla luce. 6.5 Polimerizzazione La polimerizzazione avviene in un apparecchio fotopolimerizzabile a luce UV con i seguenti tempi: Beta Vario ESPE occlusalmente e basalmente per 3 min. Dentacolor XS Kulzer occlusalmente e basalmente per 3 min. Individo Light Box Voco occlusalmente e basalmente per 3 min. Labolight LV 1 Girrbach occlusalmente e basalmente per 3 min. Polylux bredent occlusalmente e basalmente per 10 min. Spectra SL 400 Schütz occlusalmente e basalmente per 3 min. Spectramat Ivoclar occlusalmente e basalmente per 3 min. VLC Box De Tey/Biodent occlusalmente e basalmente per 3 min. 6.6 Rifinitura Nel caso di aggiunte o ribasature, queste devono essere eseguite dopo la fotopolimerizzazione e prima della rifinitura, poiché lo strato di dispersione garantisce una perfetta adesione. La rifinitura avviene come di consueto con frese diamantate (frese Diacryl) o con frese in carburo di tungsteno. Per eliminare lo strato di dispersione utilizzare dell’alcool. 1. Descripción de producto El material para cubetas y plancha base UV es un material fotopolimerizable UV que se puede obtener en tira, preformado para inferior y superior, así como en bloque para la creación individual de cubetas y planchas base. 2. Indicaciones El material de luz UV sirve para realizar cubetas individuales, planchas base y cubetas funcionales para el montaje de dientes. 3. Contraindicaciones No se conocen ninguna contraindicación actual. Si hubiese alguna sospecha de incompatibilidad solo se podrá utilizar siempre y cuando se haya realizado una aclaración por parte del alergólogo y se haya demostrado ninguna alergia. 4. Consejos de peligrosidad y seguridad 4.1 Durante la manipulación del material de cubetas y planchas base UV se deberá llevar gafas, guantes y ropa de protección. 4.2 Durante la manipulación del material para cubetas y planchas base UV no se deberá comer , fumar o estornudar. Cuando se termine de manipular o durante el descanso lavarse la mano.. 4.3 Para la correcta manipulación del material para cubetas y planchas base UV consulte la hoja de seguridad del producto. 4.4 Si hubiese contacto con la piel, mucosa o ojos se deberá lavar con abundante agua. 4.5 Puede provocar una reacción alérgica. El producto contiene: (1-metil-1,2-etanodiil)bis[oxi(metil-2,1-etanodiilo)]diacrylat 5. Consejo de almacenamiento y durabilidad 5.1 Almacenar el material UV en un envase cerrado a 10-20ºC protegido de la luz. 5.2 El material endurecido se puede reciclar con la basura de casa. 5.3 El material no endurecido se reciclara como basura especial. 5.4 Rogamos tengan en cuenta las normas escritas en la hoja de seguridad. 6. Modo de uso 6.1 Preparación del material Aislar el modelo de escayola con Isoplast (REF 540 0101 9) o otros separadores de escayola-resina. Aliviar las zonas retentivas y dientes con Transblock (REF 540 0114 9) o cera. 6.2 Modo de empleo en forma de planchas base preformadas UV Sup/Inf Escoger la plancha deseada y colocarla sobre el modelo y ajustarla. A tener en cuenta: No presionar demasiado la plancha de resina para no dejar zonas finas! Retirar con un bisturí o cutter los sobrantes de la plancha de resina. Con el sobrante crear el mango y pegarlo a la cubenta. 6.3 Modo de empleo en forma de tiras Cortar la cantidad necesaria de la tira y colocarlo sobre el modelo ajustándolo. El trabajo restante se realizará como descrito arriba con las planchas. 6.4 Modo de empleo en forma de bloque Cortar la cantidad necesaria para realizar el trabajo y presionar el material hasta conseguir un grosor de 2,5 – 3 mm. Colocar la plancha creada sobre el modelo y recortar los sobrantes como descrito en los puntos anteriores. A tener en cuenta: Después de utilizar el material cerrar bien el envase y proteger los sobrantes de la luz. 6.5 Polimerización La polimerización se realizará en un aparato de luz con el tiempo correspondiente: Beta Vario ESPE desde oclusal y basal 3 min de cada lado Dentacolor XS Kulzer desde oclusal y basal 3 min de cada lado Individo Light Box Voco desde oclusal y basal 3 min de cada lado Labolight LV1 Girrbach desde oclusal y basal 3 min de cada lado Polylux bredent desde oclusal y basal 10 min de cada lado Spectar SL400 Schütz desde oclusal y basal 3 min de cada lado Spectramat Ivoclar desde oclusal y basal 3 min de cada lado VLC Box De Trey/Biodent desde oclusal y basal 3 min de cada lado 6.6 Repasado Si se tuviese que realizar alguna ampliación de material rogamos lo haga antes de repasar el trabajo, ya que la capa de dispersión le garantiza una unión perfecta. El repasado se realiza con fresas de diamante (fresas Diacryl o fresas de tungsteno. Si molestase la capa de dispersión se puede retirar con alcohol. 7. Simbolos utilizados 7.1 Símbolos utilizados según DIN EN ISO 15223-1 Número de artículo 7. Simboli utilizzati 7.1 Simboli utilizzati in base alla norma DIN EN ISO 15223-1 Descripción de Lote Codice articolo Proteger de los rayos del sol Numero di lotto Fabricante Proteggere dai raggi solari Atención! Produttore 7.2 Símbolos según NFPA (USA) Attenzione! 7.2 Simboli in base a NFPA 0 1 0 HEALTH FIRE REACTIVITY 0 1 0 0 Diamante di fuoco 8. Ulteriori avvertenze Il prodotto deve essere utilizzato solo da odontoiatri, odontotecnici e personale opportunamente addestrato. Per la lavorazione si devono utilizzare solo strumenti e componenti originali. I numeri di lotto di tutti i componenti devono essere documentati per garantire la rintracciabilità del prodotto ed in caso di reclamo. Questi istruzioni per l’uso si basano sullo stato attuale della tecnica e delle nostre esperienze. Il prodotto deve essere utilizzato solo in base alle indicazioni descritte al punto 2. L’utente è personalmente responsabile dell’utilizzo del prodotto. Il produttore non si assume responsabilità per risultati non conformi, poiché non ha alcuna influenza sulle lavorazioni successive. Nel caso in cui, tuttavia, fosse richiesto un risarcimento dei danni, questo sarà commisurato esclusivamente al valore commerciale dei nostri prodotti. 1 0 HEALTH FIRE REACTIVITY 0 1 0 Peligro de diamantes 8. Otros consejos El producto solo podrá ser utilizado por odontólogos y protésicos y el personal facultativo con conocimiento. Para su manipulación se deberán de utilizar el instrumental y piezas originales . Todos los números de lote de las piezas utilizadas se deberán documentar para poder garantizar su trazabilidad y poder así tener derecho a realizar una reclamación. La información sobre el producto se acoge a los últimos resultados y experiencias sobre el mismo. El producto solo se podrá utilizar como se describe en el punto 2. y sus indicaciones. Por ello aconsejamos antes de su uso leer de nuevo la información sobre el producto. Todos los consejos con respecto a su manipulación se basan en nuestra propia experiencia y solo se podrá ver como información orientativa. bredent GmbH & Co.KG · Weissenhorner Str. 2 · 89250 Senden · Germany · T: (+49) 0 73 09 / 8 72-22 · F: (+49) 0 73 09 / 8 72-24 www.bredent.com · @: [email protected]
